Welcome to Healthcare Supply Manager
This guide will help you get started with managing your healthcare supplies efficiently. Follow these steps to set up the app and start tracking your inventory.
System Requirements
- Android: Android 8.0 (Oreo) or higher
- iOS: iOS 13 or higher (iPhone and iPad)
- Web: Modern browser (Chrome, Firefox, Safari, Edge)
- Windows: Windows 10 or higher
- Camera: Required for barcode scanning
- Storage: Approximately 100 MB for app and data
Step 1: Install the App
Download Healthcare Supply Manager from the Google Play Store (Android), the App Store (iOS), or open the web app in your browser.
Step 2: Sign In
The app uses Firebase Authentication to keep your data secure and synced across devices. On first launch you'll see two sign-in options:
- Sign in with Google — available on every platform.
- Sign in with Apple — available on iOS 13+ and macOS 10.15+. Required by Apple's App Store guidelines and gives you the option to hide your real email address.
You only need to sign in once per device. After that, your inventory syncs automatically whenever you have a network connection. The app continues to work fully offline, and any changes you make sync to the cloud the next time you reconnect.
Step 3: Grant Permissions
You'll be asked for the following permissions on first use:
- Camera: Required for scanning barcodes and taking AI label-reader photos.
- Notifications: Optional but recommended — the app uses notifications for expiration and low-stock alerts.
- Local network / Wi-Fi info (iOS only): Optional, used to fingerprint storage locations so the app can auto-detect which shelf you're standing in front of.
Step 4: Explore the Dashboard
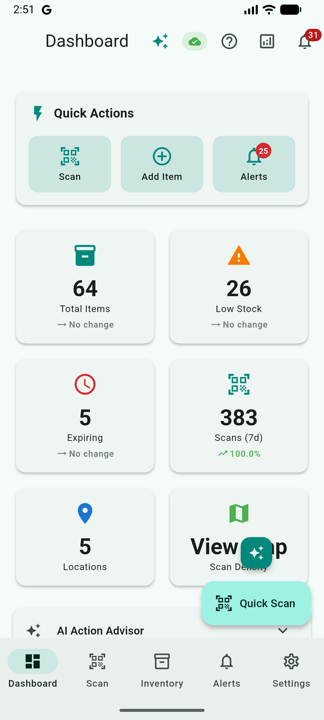
The main dashboard shows a live overview of your inventory:
- Total Items: Count of all tracked supplies
- Expiring Soon: Items approaching their expiration date
- Expired: Items past their expiration date
- Low Stock: Items below their minimum quantity threshold
- Recent Activity: The latest scans, adjustments, and dispenses
If you have an AI provider configured, the dashboard also shows an AI Action Advisor card with reorder and waste-reduction suggestions tailored to your inventory.
Step 5: Set Up Locations
Locations represent physical storage areas (a shelf, supply room, crash cart, etc.). Organize your inventory by creating locations first:
- Open the navigation menu and select Locations.
- Tap the + button to add a new location.
- Enter a name (e.g. "Supply Room A", "Emergency Cart 3").
- Optionally print and attach a location barcode — the app generates one for you.
- Tap Save.
The app can also auto-discover locations: when you scan items in three or more nearby spots that don't yet have a named location, it suggests creating one based on the Wi-Fi fingerprint of your surroundings.
Step 6: Scan Your First Item
- Tap the camera/scan icon on the bottom navigation.
- Point your camera at a product barcode.
- The app automatically detects GS1, DataMatrix, QR, and standard retail barcodes.
- Review the parsed data in the bottom sheet that appears.
- If lot number or expiration are missing, the AI Label Reader automatically captures a photo of the label and fills them in. See the AI Features page for details.
- Select a location and quantity, then tap Add to Inventory.
Step 7: Configure Alert Settings
Set up expiration and low-stock alerts so you never miss important dates:
- Open Settings from the navigation menu.
- Find Expiration Alerts.
- Enable notifications.
- Set your preferred warning threshold (30, 60, or 90 days). You can also set per-product or per-class thresholds for items that need different lead times.
Next Steps
Now that you're set up, explore these features: